Electrical panel

Sabre did a great job with the electrical panel on these boats. You can undo two screws and the whole front of the panel folds down giving you easy access to the guts of the system. But any boat that’s 25+ years old, had several owners, and  have had “upgrades” and additions to the systems, it causes what was probably a very clean factory panel to look like spaghetti. 


I wanted to solve a few issues; I wanted to rearrange the breakers to make more sense to me so I didn’t have breakers in seemingly random locations on, and make it easier to trace issues or add items later. Grouping breakers to areas (one panel for house type things i.e. lights, water pump, gas solenoid, etc. other panel for instruments, chart plotter, radar, etc, last panel for nav lights, steaming light, deck lights, etc.) isn’t as easy as moving some breakers and a few wires. You basically need to disconnect everything, and move it all.

So if I’m going to do that, then I’m going to try to make it even easier to deal with for the future. This led me to installing terminal blocks on the back wall, running wires to the breakers and going through more labels then I thought possible. 

While it still looks like spaghetti… it’s amazingly much easier to deal with. I found several wires which were just hanging out un-connected. 

Each wire is labeled at both ends, and each terminal block is labeled. There are several open positions, which I can use for additional items, or if I’m overloading one block, I can easily add as needed. 

All that’s left to do is find where the abandoned wires go, and straighten up a few things. I’m much happier getting into the panel to sort out any issues now, which gives me great peace of mind. 

Posted in Uncategorized | Leave a comment

Plants

Obviously I’m not great about updating my blog… I’ve either been busy, haven’t documented projects very well, or are mid project on several (or don’t want to publish some failed projects). 

One sacrifice typically made living on a boat is not having plants. While I’m not what anybody would consider to be a green thumb, I do like having plants around. But how do you deal with them on a boat, there are obvious space issues, and how do you secure them for sailing. 

Having pots with dirt falling off counters would ruin your day. Sure, you can glue one down, or drill holes and screw them down… but I’d rather not permanently attach things like this. Also, not being a green thumb, low maintenance, hardy plants are important.

One of the solutions I’ve come up with is using airplants! These things are awesome. So many varieties, colors, shapes, and they’re ridiculously easy to take care of. Some flower, some are weird looking, and their all relatively inexpensive ($4-$10 each). I get mine all from Airplant Design Studio who have an awesome selection, brilliant service, and great plants!


Here are 3 of them that I purchased with urchin “pots”… they look like weird sea creatures. You can see they’re mounted with fishing line, nothing permanent. About once or twice a week they need a soaking, so I would fill a cup with water and hold it up submerging the plants. It actually got annoying, so I now have magnets hung from the fishing line, and glued magnets to the plants, so I can pop them off to water. 

Magnets worked so well, I wanted to use them elsewhere. What I did was remove some teak trim parts, drill a recess in the back, epoxy a magnet in (to protect from moisture, and glue it in), and re-mount the trim. You can’t see anything when looking at the trim, but a plant with a magnet pops right on! 

 
Well, that worked… where else can I put these? Sabres have a liner that’s pretty accessible, so I opened one of the instrument access panels, put a couple magnets in, and stuck more plants up. 


The cool thing is you can just pop the plants off to soak them, or move them around. I used neodymium magnets in the hidden parts, and a mix of neodymium and ceramic magnets attached to the plants, or corks… these magnets are more than strong enough to hold the plants in place when sailing. Once I get my 3D printer next month (a different blog post) I’ll make cool little “pots” for some of these plants. 

A couple things to note, do not use superglue on the plants at all… it kills them. Also, don’t put magnets around your instruments, especially any compass… it’ll make your autopilot do weird things. 

Posted in Uncategorized | Leave a comment

Exterior Teak

One of the things I really like about Sabre is their use of teak, enough to look yachty, but not so much that it’s a pain to take care of. My Sabre only has teak towrails, handrails, and the teak stripes just in front of the cockpit which acts as a trademark. 

   
 The teak sat neglected for years, but had been well varnished prior, some parts of the old varnish hung on for the 3 or 4 years (or longer, not sure when it was varnished last), which was impressive. Obviously I can’t own a Sabre and leave it looking like this. 

I cruised around the net looking at my options, and was close to settling on the tried and true Cetol method. I’ve used that on my other boat, and it works well, but I’m not stoked about the process. Then someone turned me onto Semco

Rather than a varnish, or an oil, it’s a sealer with a stain in it. It comes in various shades, my buddy had one of the lighter shades on his boat, and it looked like the teak was just installed. It’s not glossy, but just looks like raw teak. The process is amazingly simple, and doesn’t take long when compared to varnish. 

  
So I heatgunned, sanded and sweated the old varnish off to get to a relatively clean bare wood. Then I used their two part teak cleaner. 1st part is an acid that turns the wood really dark, like scary you-just-messed-up dark. Then you rinse it really well, and apply part two which magically turns the wood back to a light teak color. It’s fun… unless you don’t use gloves like I did and your hand starts to burn a little. Use gloves. 

  
Let the wood dry for a day, then start applying the sealer. It’s really like a stain, very watery, and the color separates quickly. I used a solo cup to keep my volume low so I didn’t need to keep mixing the whole can of sealer every brush stroke. I also just used a small sponge to apply it. Keep rags handy, and some acetone or alcohol to wipe up spills and drips. The acid washing of the teak will remove the wax you had on the fiberglass, so I actually applied a quick coat of wax between the cleaning and sealing part. I also did another sand with 220 to knock down the grain that gets raised by the cleaning process. It’s recommended to not put tape down, as the sealer will want to wick under the wood, and will likely wick under the tape meaning you can’t clean up spills, and your fiberglass will be stained. 

The first coat might be a bit blotchy, Semco recommends 2 coats only for the first time, and it evened out really nicely on the second coat. I put 1 coat on, then immediately turned around to do the second coat.  

 This photo shows the left rail sanded and cleaned, the right rail is after two coats of their dark brown applied to it. 

  
This is amazingly easy to work with, but like anything to do with teak, or boats for that matter, preparation is everything. Water beads right up on the teak, which lets you know it’s still effective. They say it’ll last a year at which point you wash it with mild soap and a brush, let dry, and apply another coat. I’m probably going to apply another in a month or so, as this teak dried out an extraordinary amount. 

Highly recommended for its ease, we’ll see how long it lasts. 

Posted in Deck, Repair/refit/upgrade, Wood | 3 Comments

SmartPlug shore power


A few nights ago I woke up at 2am and noticed the fan I have running usually had turned off. First thing I thought was I had tripped the gfci on the outlet, it’s an old outlet, we had a good storm roll in earlier and I’m certain I haven’t found all the deck leaks in the boat. 

So I get up and check it and notice that all the boats power is out! Quickly I flipped all the breakers off, main shore breaker off… run up top and turn off the breaker on the dock. I didn’t smell anything burning… but I’ve always been worried about the shore power connection. The cord that came with the boat does not have the right end for connecting to the boat; the ring that’s supposed to screw onto the boat doesn’t actually get to the outlet.  

The only thing holding the cord to the boat are the prongs on the cord, which are not terribly secure. 

It turns out that the marina docks had lost power. But it still made me nervous enough that at 3am I ordered a new SmartPlug (linked to Compass Marine review) from Amazon. It has been on my list of upgrades since day 1, but the 2am panic moved it to the top. 


 These are two pictures of the shore power plug on the boat showing where it obviously has had issues in the past, the bottom one is once I had it disassembled. This is so common with these plugs that I actually had someone tell me that “they all look like that, I wouldn’t worry about it.” This standard was apparently created in 1938. 

This morning I installed the new SmartPlug. Took about an hour… but was super easy. They provide perfect instructions, and everything went as expected. Now I have confidence in that connection. Not only do the prongs have way more contact area, but the actual plug connects so positively that you know it’s in, and won’t come out accidentally. 


To me, this connection is like having a big anchor when a storm rolls in, probably would have been fine without it, but now I sleep better. 

Posted in Electrical, Repair/refit/upgrade | Leave a comment

ICW

I’ve not been very good about updating this blog, especially with the trip up the ICW.

Vellamo was in a marina in Sneads Ferry, about mile marker 249. My buddy Tim came down to help move her up in what we initially planned as a 5 day trip. 

The first day was an easy ride, about 20 miles to Swansboro. Perfect little shake down jump. Far enough to get a decent run in, close enough if something happened that we needed hauled out.  

   
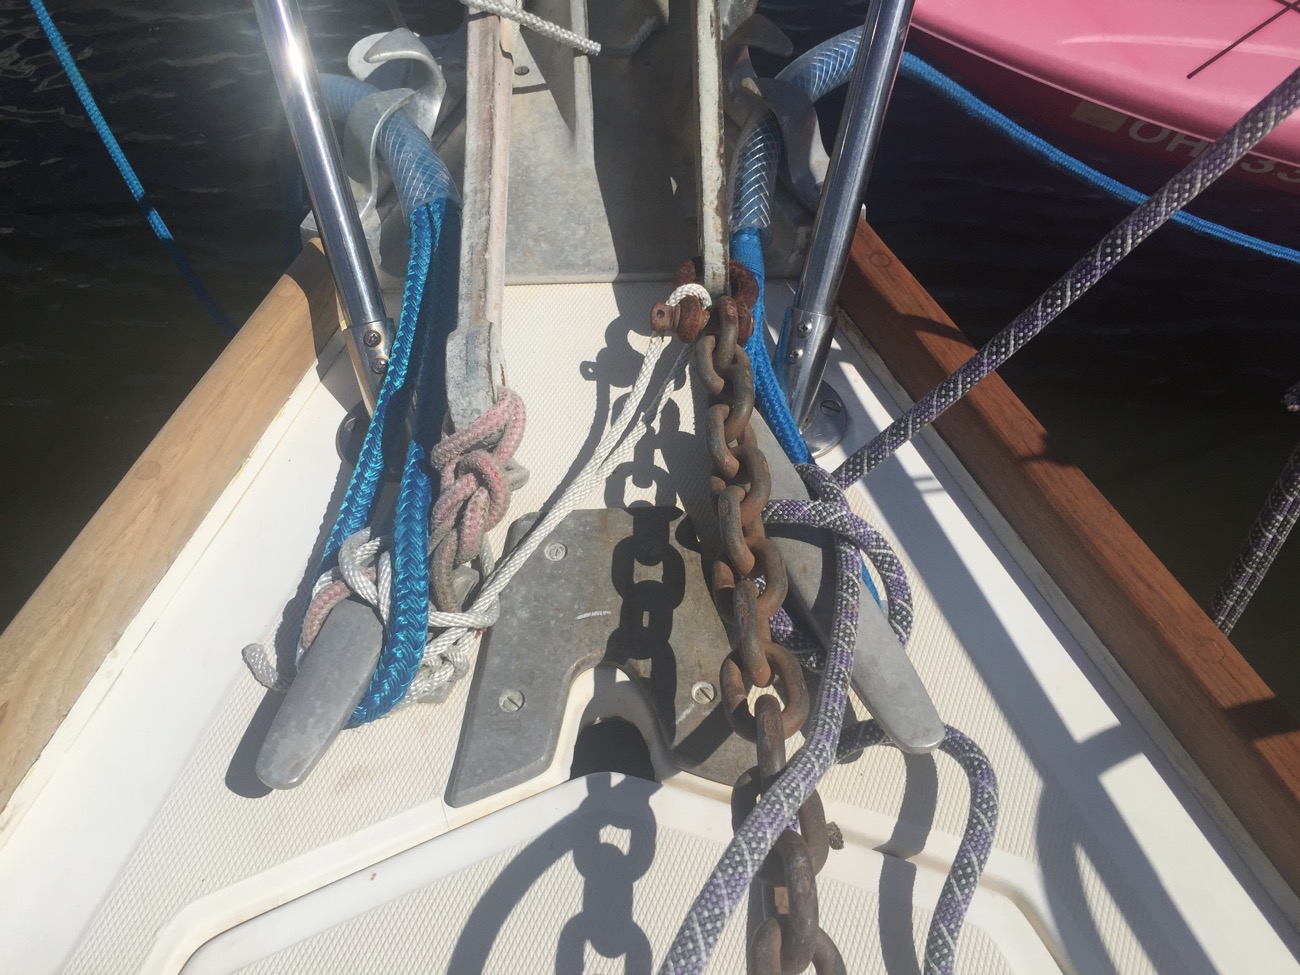
Here we ran aground the first of what I’m sure will be many times. Just a light tap, and we backed off no worries. Vellamo being a centerboard means she only draws 4′-9″ with the board up, but the ICW is unforgiving on the edges of the channels. 

Tim and I discussed our plans for the trip and figured instead of 50 or 60 mile days, we could push that to 90 mile days and get in a day early. This wasn’t a pleasure cruise, it was a delivery.  

This part of the ICW goes from small canal to open river/sound/bay then back to canal again, which is pretty interesting. Parts feel like you’re headed up some tiny river in a big sailboat, while other parts are pretty open like the southern part of the Chesapeake. Our second day was indicative of this as we went thru Bogue sound, past Morehead City, thru Neuse River across the Pamlico Sound and into Pungo River. 

We pushed passed Morehead City which was pretty cool. Lots of traffic that disappeared as soon as you turned the corner. 

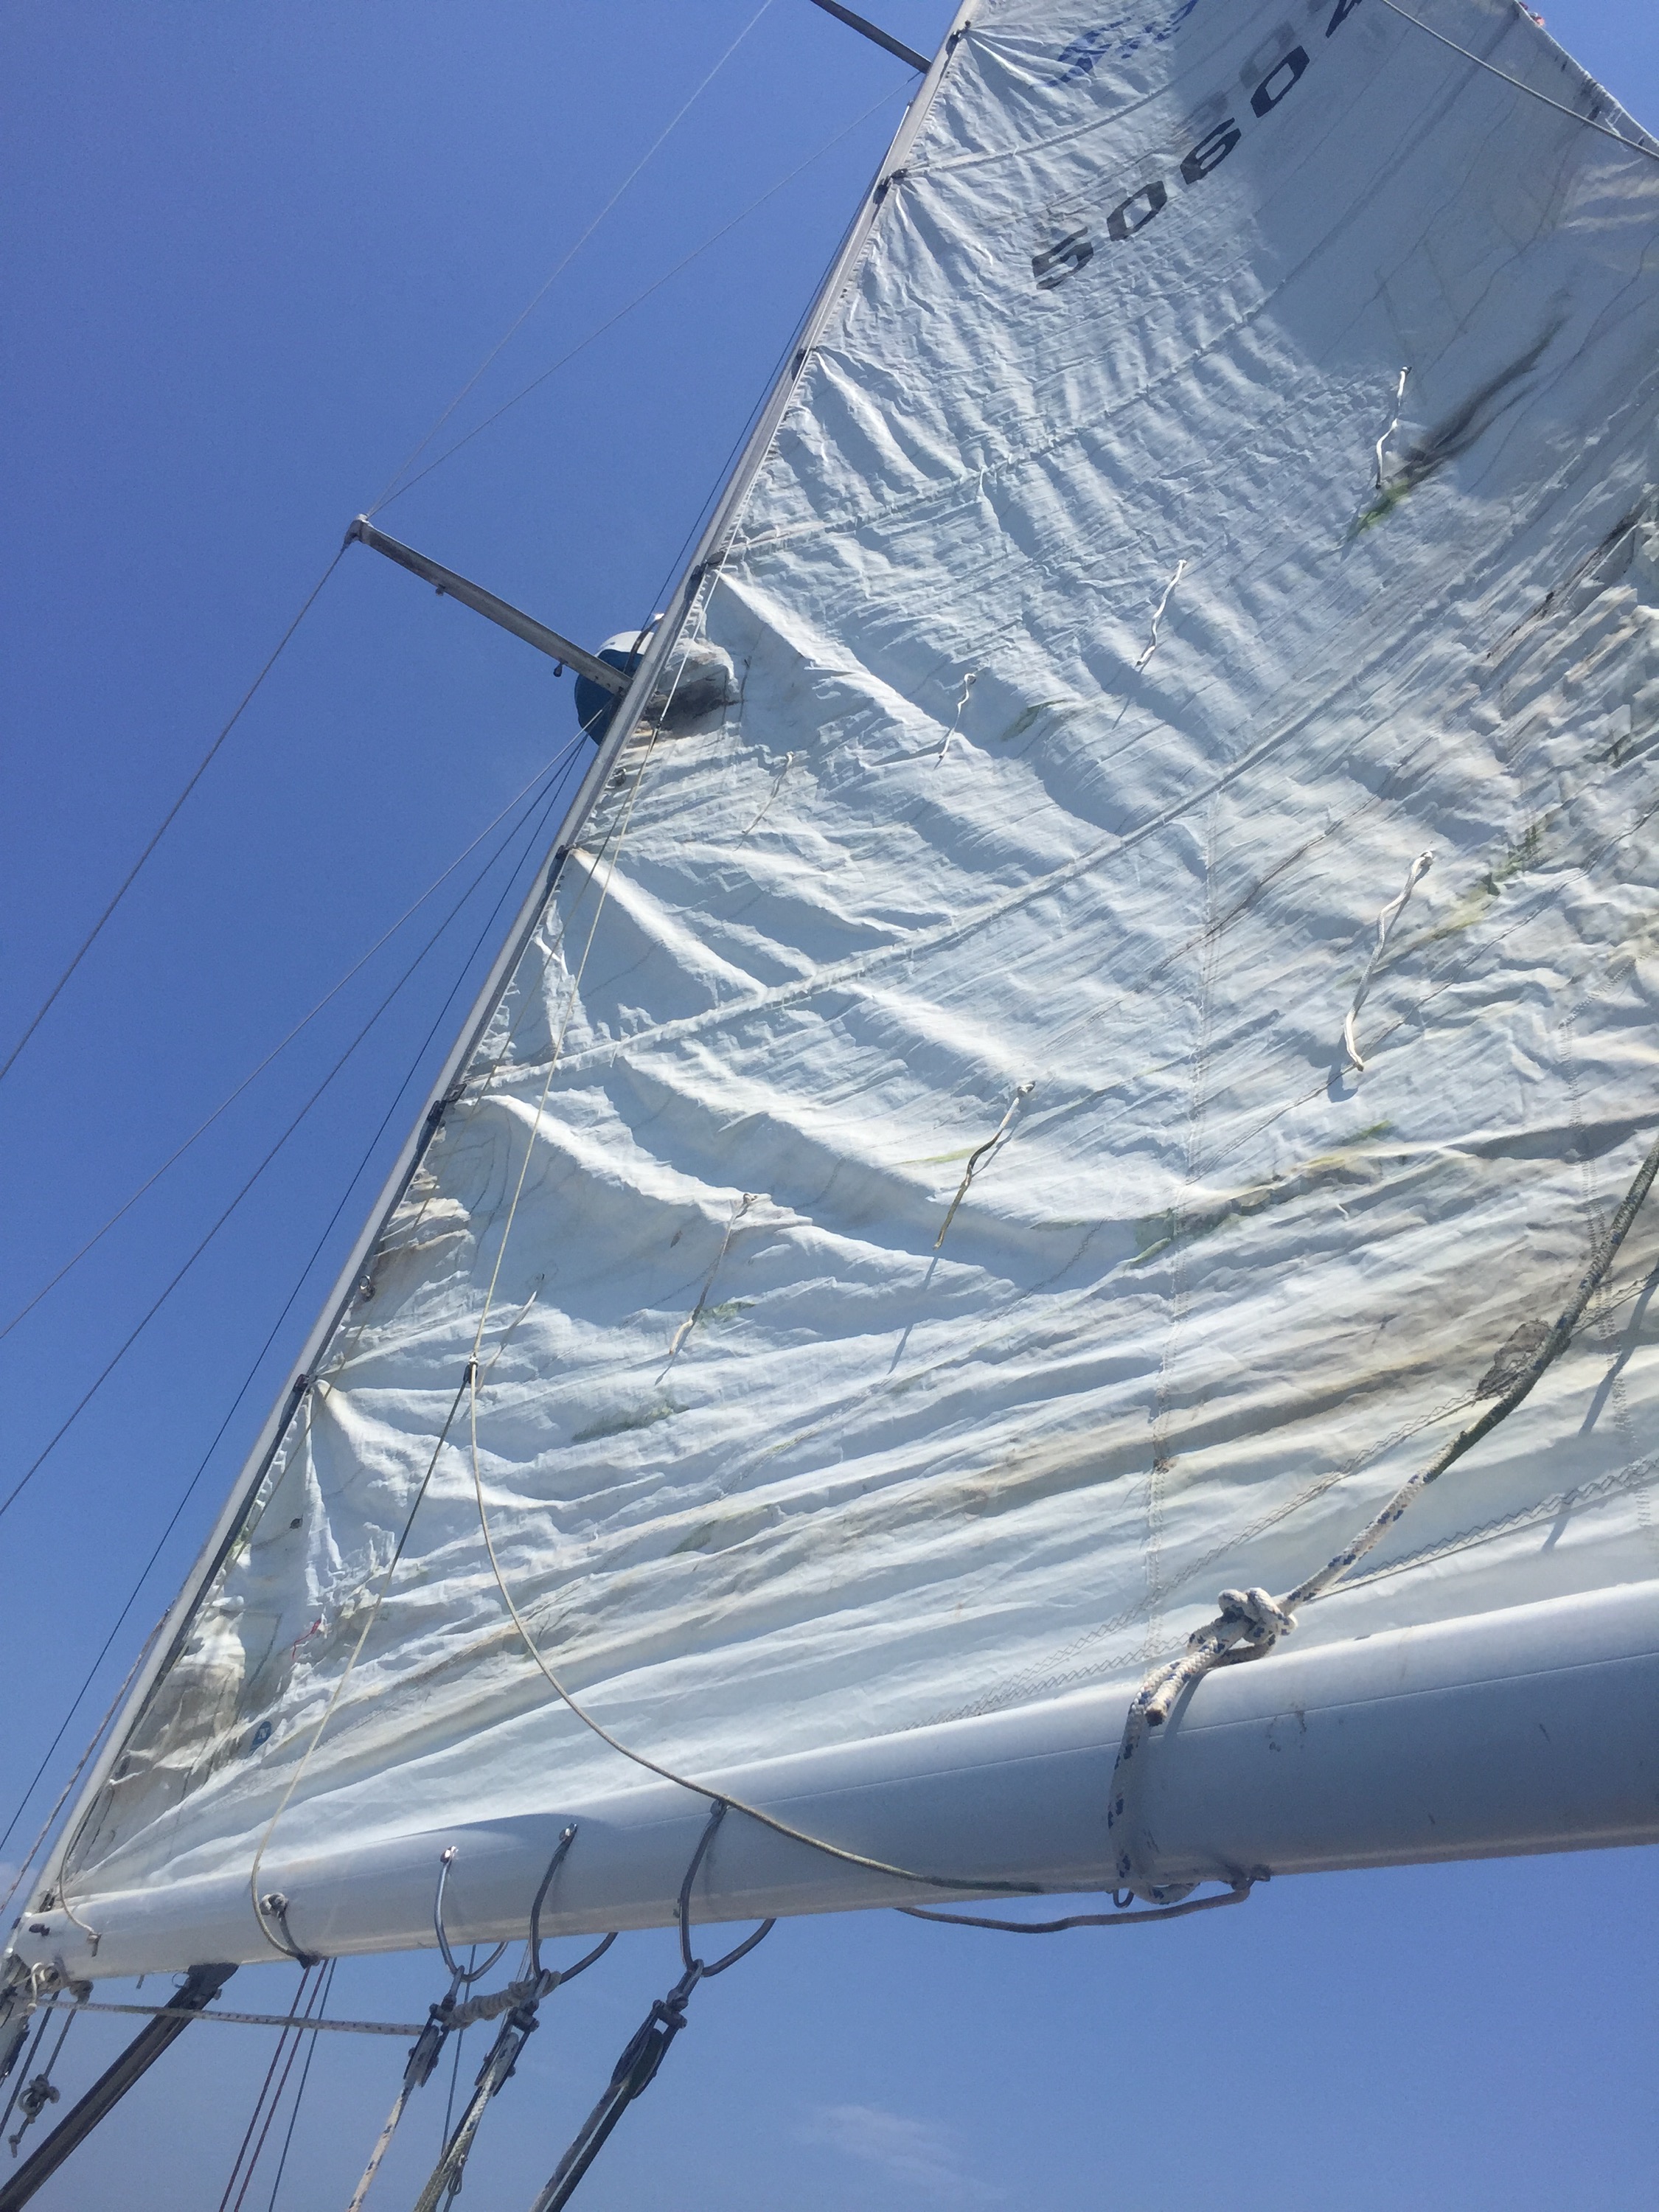
The Neuse River was the first place we could raise a sail… so we put the main up and motor sailed for a while.  


Pulling up the sail let all the left over bits and pieces of birds nest drop out, which was after I had cleaned out what I could at the dock. 

 
We anchored in a bay in the Pungo not far from Belhaven and watched a brilliant thunderstorm just off the shore. It wasn’t until 2 in the morning or so that the storm made it to us and started to kick up the wind. We started the engine as a precaution but as we were the only one in this little bay we had a massive amount of scope out on our anchor and never dragged an inch. 

The next day we were up early again with a target of Elizabeth City. We shot thru the canal into the Alligator River and into the Albemarle Sound. The breeze was behind us so we opted not to sail, which turned out to be a good thing… we cut the ICW track by several miles because we had the water for it, but that set us up for 3 hours of crab pot watch. It’s impressive the number of pots in this area.  


The dog was pretty good at spotting crab pots that we passed already. 

We ended up making it the 90 or so miles to Elizabeth City where we tied up to the sea wall by the park which is a bit of a weird experience. The dog immediately jumped off to go roll around in some grass. This was our first night without an actual storm hitting us, even though it seemed one was following us up the river to Elizabeth City the whole time. 

The final day we set off up the Dismal Swamp… which had to be named during biting fly season. It was ridiculously hot, and the boat was covered in biting flies, there was no escape, and they hurt!  

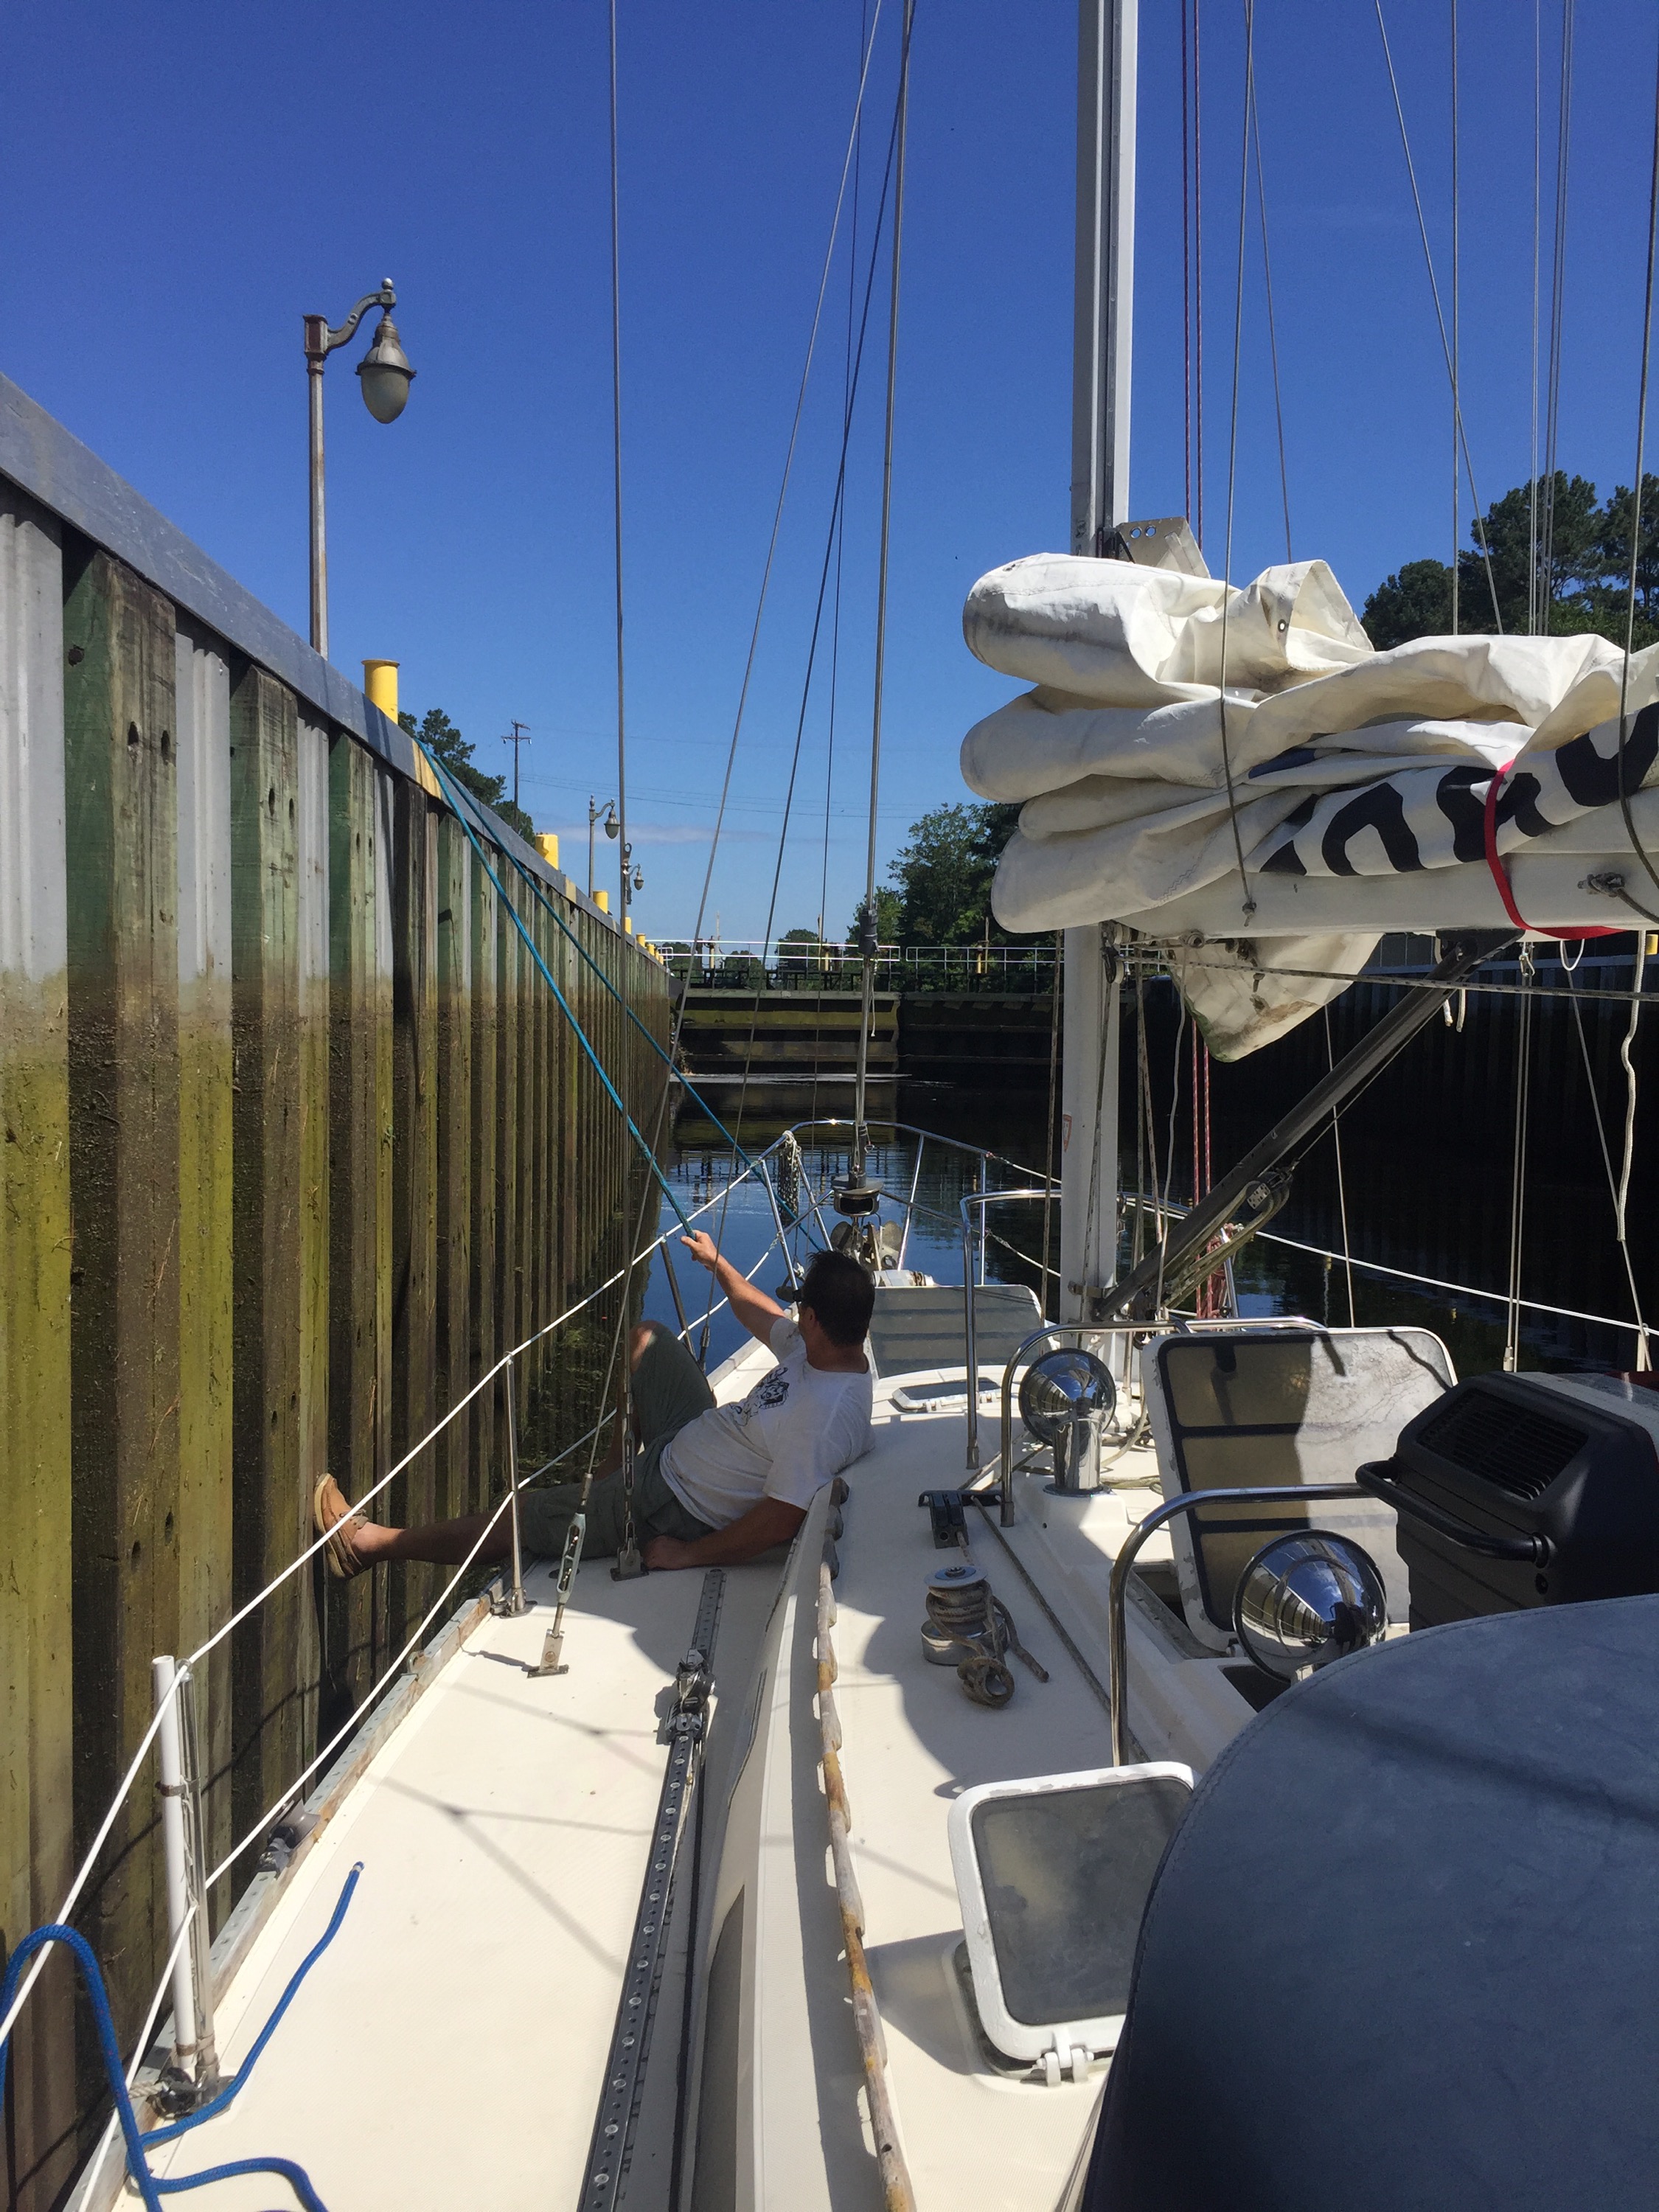
 This is the first lock as you head north. Our timing was off, we had missed the first opening by 30 minutes, so had to hangout and wait for a while. 

  
This is a pretty typical Dismal Swamp scene. We bumped one log, dodged 1 turtle who acted like he owned the thing, and hit one tree while dodging another log. We were told we hit a bunch of trees, but it’s pretty open, and as we didn’t run into much traffic, you’re more likely to hit a tree while attempting to smash the flies that are biting you or because you’re watching the scenery pass and not looking forward. 

  
We cruised by Norfolk and raised a sail to motor sail thru the HRBT and in Salt Ponds for home. 

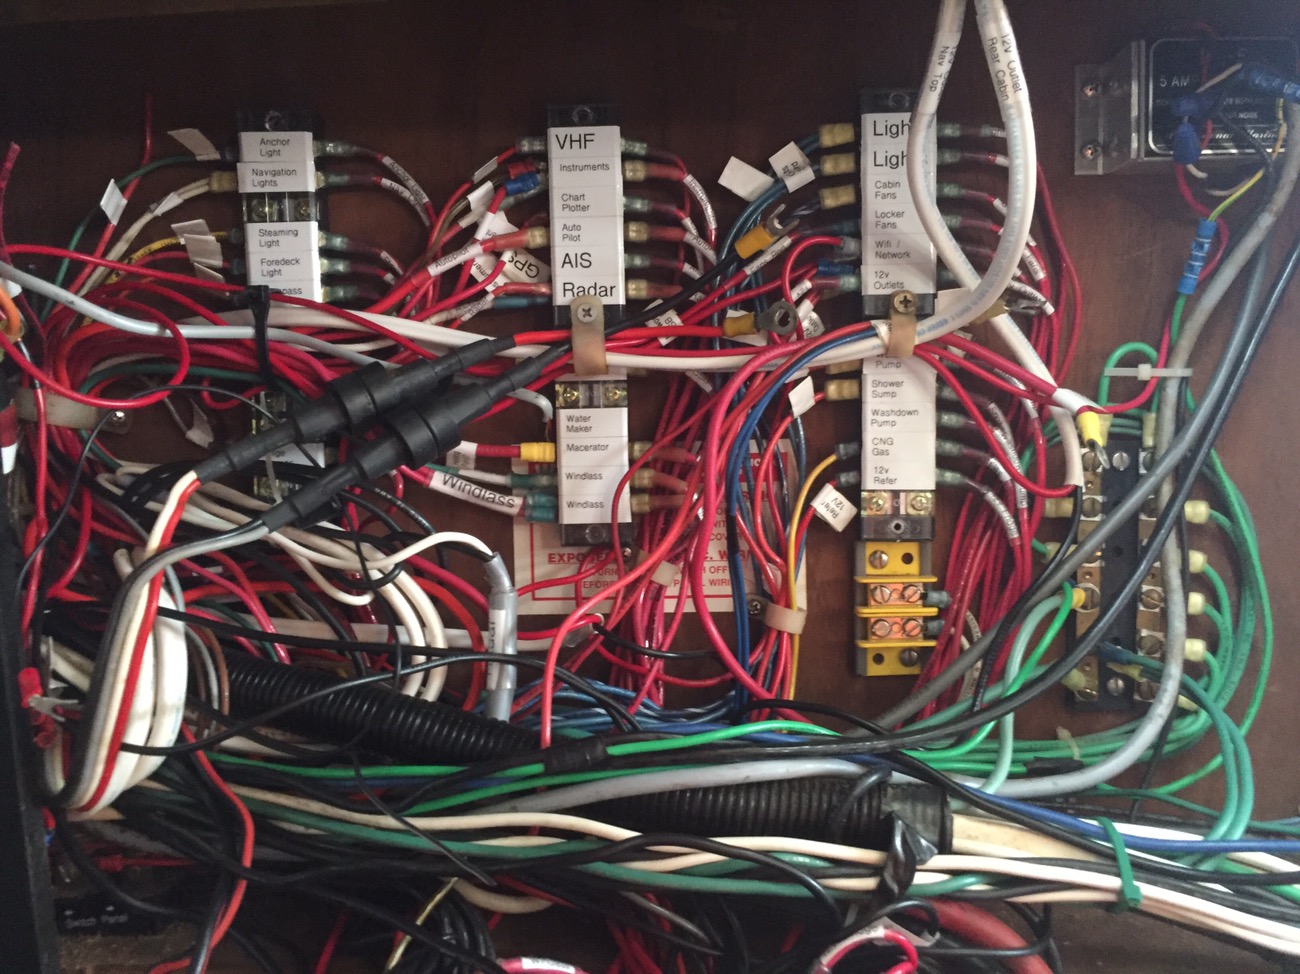
Thanks to the crew, we made it in what must be record time… at least record time for us. We did the whole trip with an iPad charting (chart plotter wouldn’t see the gps for some reason) and a depth sounder that only worked when we didn’t need it. The autopilot did however work brilliantly… as you can see by the following photos of the crew steering. 


Posted in Cruising, General | 2 Comments

Launch

Well, she floats! 

 
The yard launched Vellamo on Saturday (13th), and were kind enough to time it where they left her on the slings till Monday. Not that she needed it really, but it’s good to know that if something does give way after sitting on the hard for so many years that you have slings under you.  
 There are videos of it… I just need to take the time to splice them together and not make them so boringly long. Total launch time took over an hour… but that included a run to get more fuel for the lift. 

Only boat owners understand the anxiety and elation with the whole process. It feels so good to have her floating. 

The first thing most people do when they get their boat in the water is start the engine. Not me… I wanted to see if the AC’s worked! It was over 90 degrees, and was expected to stay that way all week. When you buy a neglected boat, and it’s not in the water you can’t really test everything, so I had no real idea if the ACs would work. 1 works, and works brilliantly! The other has what I believe is a minor issue, so I count this as a massive win! It actually can keep the interior at 69 degrees when it’s near 100 outside… and there’s no insulation. The dog has a new favorite place, and drags a floor mat over to the vent to lay right in front of it. I imagine it’ll be the same in winter as it’s also a heater. 

The engine also turned over without any hesitation at all! Remarkable. Must have been the lucky shirt I was wearing.

Next up will be the move to her home port in Virginia. 


Posted in Uncategorized | 3 Comments

Deck drains

My dog pee’s on the boat. She doesn’t really get a choice about it, and I like that she’s cool with that. I wish she’d hang her butt over the side… but she and I both know she’s not going too. On my C&C this meant there’d be a little puddle of pee on the sides till I hosed it off. I put in a deck wash down pump just for this purpose… works fantastically. 

  
Sabres have this cool little deck drain at just the right location, and it drains into the cockpit drain thru-hull. I love it because it means less need to hose the boat down. But when one of those drains fail… it’ll be horrible. Guess what… 

This is a picture of the deck drain on the starboard side. Obviously it had failed before and someone just shot a bunch of stuff in there to seal it enough… not a good enough solution to keep the smell of dog pee out of the boat!
I ordered replacement drains which took a bunch of research to figure out (Forespar sink drains, mfg#907014 incase someone else needs to know) but they wouldn’t be here for several days, so I had to improvise.  


This worked surprisingly well till the drains came in. Every time the dog would pee, I’d wait till it all drained into the bottle, and empty it. Tada. Works awesomely, just need to get drains installed before any rain, or sailing happens. Guess what…

We got slammed with a massive storm, at 3am, and it filled the bottle in the time it took me to hear the storm, get up, and get to the drain to see what I could do. Now I have a 1″ hole that drains half of the water hitting the deck into the bilge… well half of the water that’s not coming in thru other leaks, but that’s for another post. Now I’m left searching for something to plug that hole. Oh yeah, I bought this magic-plugs-everything-stuff-some-guy-on-the-Internet-says-works. Stay Afloat


It works! I scoop some out with a screw driver, roll it into a ball, flatten that ball out some, run up on the deck, plop it on the hole, and spend the next 30 minutes trying to get that sticky, waxy stuff off my hands. Boom. 

 I haven’t tested it under water, with pressure behind it, but I don’t see why it wouldn’t work in that condition too if you backed it up with a block or something to help resist the pressure. 
Now on to all the other deck leaks. 

Posted in Uncategorized | Leave a comment

Sabre rot

Apparently there is a pretty consistent problem with Sabres of a certain vintage where the mast step doesn’t have a large enough drain, thus gets clogged easily, and saturates the structure and sole of a boat. I’m really surprised Sabre took so long to address this issue, but Vellamo certainly fell victim to it. It’s well known enough of a problem that they have a name for it, Sabre Rot.

Before

This is the floor as I bought it.

Here you can see the plys of the plywood delaminating. I don’t know if this is common, but Sabre had a layer of plywood, then a layer of fiberglass, then plywood with teak and holly veneer over it. Makes for a solid floor and maybe it was part of their “solution” for the floor getting wet?


This shows how rotten the wood actually was. It crumbled apart in my hand, and I could squeeze water out of it!


 This is with that section of floor removed and ready to put new plywood down. I’m not doing the whole floor at this time as this was done solely (haha… Get it?) to satisfy my insurance requirements before I navigate any waters with the boat. 

I don’t have a shot with the plywood on it, but you can imagine ugly plywood floor in this place. It’s temporary until I can figure out which product I want to use and redo all the floors in. 

Posted in Interior, Repair/refit/upgrade | 2 Comments

Batteries

Vellamo came with 8 group 31 wet cell batteries. It hasn’t had a battery charger hooked up for 3 years… so naturally all the batteries are dead. I figured instead of writing off all of the batteries, I’d take a $100 gamble and buy a pulse charger that’s supposed to desulfate and resuscitate dead batteries. It’s an Optimate 6 by Tecmate.

I didn’t expect it would bring the batteries back with much capacity, if at all… but it actually works. 2 of the batteries are taking and keeping a decent charge (I estimate I’m getting about 80ah out of each now). 4 of the batteries are too far gone, and it’s working on the other two right now. 

It takes days for this charger to bring back a single battery, so in the mean time I need to have dc power. I turned on the battery charger, and the dc switches, and let the charger run things. The battery banks showed a good charging voltage, but as soon as I turn the charger off, they drop away. During this, I kept my eyes on the batteries, and one started to boil off. I pulled all the cables off it, and part of the case had actually melted. Very scary.  


I’m not sure if it’s the boat wiring that caused this, or and internal issue of the battery. Regardless, that battery is off the boat, and it moved my rewiring project further up. I decided to rewire all the big gauge stuff, because I don’t really know what was going on with it. 

The greatest tool I have bought for electrical work is a label maker! Wires seem obvious when you’re putting them in, but come back in 6 months, and you won’t remember what went where. Or if you need to figure something out in a hurry, or if you need to pay someone to work on things, you’ll be much better off having things labeled. I try to label every wire on both ends, if I have to bundle it somewhere, and everywhere it travels thru a locker or such.


Not everything is labeled yet.


I installed a Blusea ACR, a Victron 702 battery monitor and fuses on the battery posts. While obviously not completely necessary, these items give me the confidence in my main power system that I can relax and not worry about it. 
I have to give credit to Compass Marine for a lot of the guidance. That website is an incredible resource. 

There are a few things left to do, I’d like to run my alternator directly to the battery bank, along with the battery charger, but I’m happy now with where things are at. 

Posted in Electrical, Repair/refit/upgrade | Leave a comment

Sealing the ports

A boat sitting neglected for so many years will leak. This boat has 11 ports and 8 hatches, along with the companion way. That’s awesome for getting air to move thru the boat, but it takes maintenance to keep water out. 

  
The ports Sabre put in are actually pretty cheap plastic. I’d have to admit that I’m not impressed with them. They’ve since changed manufacturers, and have much nicer stainless ones, but I can’t afford the $2,000 or so to change them all out to nicer stainless versions. So I pulled all the seals and cleaned them all up. Every single one leaked and was filthy. I had to soak them overnight to clean them. 

One port showed leaking from the frame, rather than just broken/bad seals… so I pulled it out to see what I could find. I opened a can of worms. I will admit my solution is temporary, but I will eventually pull every port out to rebed them all. 


 Here you can see the cabin and liner joint. I’m not sure if these voids are ok or not… but it seems like a great place for water to find a secret place to rot something out. I plan on filling these with epoxy eventually, to stop giving any water secret access to hidden places in the case of a leak.  


 This photo shows the condition of the deck prior to my purchase and cleaning. 

I don’t have any photos taken during the actual process of putting the ports back in, but I stuffed half a roll of butyl in there, around the frame, and on the exterior beauty frame to keep water out. I’ll do better when I rebed the whole lot of them.  

Posted in Deck, Interior, Repair/refit/upgrade | Leave a comment